Tuesday, May 10, 2011

Take Better Pictures! Part B

Let’s talk about light.  Bay-Bee!

Light is photography. Photography is light.  Did you know that the greek word “Phos” means light?  Hence, photo.  Graphy is to write.  Writing with light eh?  Yup. 

So.  We’re going to talk about light today.  The right kind of light is the difference between an average photo and a spectacular one.  And really, I could write about 10 pages talking about lighting, the effects, different kinds, where, when how, why, whooza, whatsit…etc.  But today let’s focus on the different lighting situations you will most likely be faced with on a day to day basis.

Check it. (The following pictures are Straight-Out-Of-Camera {Sooc} to give you a better reference)

3 pm.  Half shade.  Half sunlight.

_MG_2669

My niece.  Cute girl.  HORRIBLE lighting.  It’s coming in from all the wrong angles.  It casts unattractive, uneven shadows across her face.  It’s just….blah.

Let’s spin her around.

5:30 pm February. Backlit.

_MG_2806

Better right?  It was later in the day.  She is back-lit, meaning the light is shining right on her back, illuminating her hair.  Parts of it are over-exposed but I don’t mind it.  I feel it’s an ethereal quality.  And with the right edit, you can really make this picture pop.  Like so:

rubes-1

Voila!  It’s amazing what post-editing can do, BUT the right kind of lighting is absolutely key.  If you have crappy lighting, no amount of editing can make it better.  Trust me.

Windows.  They are the best.  When the sun is not shining directly through them they are the ultimate source of natural, diffused, soft light.  Indirect light. 

My bedroom.  9 am.  Sooc.

IMG_8942


5 pm.  Slight post editing. Window light.

binky-1


This picture is one of my favorites ever, of my girls.  And I took it when I just starting to learn about photography.  Light was the last thing on my mind.  I just thought it looked cool.  Now, I can pick it apart technically, there are some things I would do differently but… I still love it.  They are backlit.  The window light is coming from behind them, toward me, instead of the other way around.

fairies (1 of 1)


6 pm early May.  Backlit.  Light coming from back left corner.

messy-1


Same time and day as above picture but she is under a shade cover, thus creating smooth, even light.  Sooc.

IMG_7850


 Yup.  You guess it.  Backlit again. Can you tell I like it??

kelli5 (1 of 1)


Indirect window light.  2 pm.

cake-1


Natural light is your best friend. Know it.  Study it.  Watch how it falls on people during different times of the day.  Take a picture and then spin your subject around and around and around until you know exactly which position gives you the best possible light, or until your subject pukes.  Whichever comes first. 

A tip?  Look for catchlights in the eyes.  It will make your subject appear livelier, brighter and fresh.  Those are best created when your subject is looking toward a light source like…ahem…windows.  Or, if it’s bright sunlight in the middle of the day and you’re outside, have them in shade looking out and up toward the light. Example:

  This was taken in the middle of the day.  Overhead sunlight does not bode well for pictures.  I had her duck under shade created by a nearby building but she was looking out from under the shade, toward the sun.  Sooc.

IMG_6911

And that is all I have time for on this subject.  Until next time!

Tuesday, April 26, 2011

Milk Chocolate Banana Bread

Time for some more food, right?

Ahh, banana bread.  Classic, tasty and always seasonal.  

I love banana bread and I've tried lots of different recipes.  Some healthy with whole wheat flour, some not so healthy and loaded with chocolate chips.  I've found quite a few that I like, but I always come back to the one I'm sharing with you today.  It was probably the first banana bread recipe I ever made.  My mom found it in a newspaper article, I think.  I wish I could site the source correctly, but we've used it for so long, that it's now just one of those standards in my family's household.

I think my sister might have come up with the name--Milk Chocolate Banana Bread.  Doesn't that just sound delish?  This is definitely not one of those "healthy" banana bread recipes.  But, come on, isn't all banana bread at least a little healthy?  That's what I tell myself when I eat half a loaf for breakfast.  

Milk Chocolate Banana Bread


3 eggs
1/2 cup vegetable oil
1/2 cup white sugar
1/2 cup brown sugar
1/2 tsp salt
4 ripe, mashed bananas
2 cups flour
3 tsp baking powder
1 cup milk chocolate chips

Whisk eggs, oil, sugars, salt and bananas.  Combine flour and baking powder with fork in separate bowl.  Add flour mixture to egg mixture, along with chocolate chips.  Don't overmix.  Bake in an 8 x 4 loaf pan at 350 degrees for about an hour.  It should be a deep golden brown and a toothpick should come out clean.  My loaves usually take a little longer than an hour. 

Tuesday, April 12, 2011

Paint Chip Projects

You know how every time you walk by the paint section at Home Depot or Lowes and you see that glorious giant wall of paint chips and that little nagging voice in the back of your head says you could do something awesome with all those paint chips?  Oh, that never happens to you?  Oh.  Well, it happens to me.  Something about all those pretty colors lined up so nicely sparks the crafting side of my brain.  Alright, lets be honest, it doesn't take much to spark that side.  


Anyways, you know all those free paint chips are just waiting to be used in something super sweet, but what?  Maybe you're not going to go as far as this guy (besides, taking that many paint chips I kind of think borderlines on stealing),  but the options are endless with those little pretty pieces of paper.  


What got me thinking was spying this post over on Ohdeedoh - the children's section of the design blog Apartment Therapy.  Which led to the awesome blog Modern Parents Messy Kids.  And with Easter just around the corner, this is such a fun and simple way to add cute Easter decorations.  (Which is a big deal for me, since I am not big on decorating for holidays other than Christmas.  Maybe that will change once my child is older than a month.)  If you have kids you trust with scissors, you can force make a project out of cutting out the eggs. 


Besides that fun garland, there are lots of other ideas out there on the web of things to do with paint chips.  


I'm a little bit in love with these Valentines from Country Living.
You could easily use different colors and stamps to make cards for different occasions.

Wreaths are some of the easiest things to make, and you could easily use paint chips to make this wreath.  It would barely cost you anything and would be so fun for something like a birthday party.

But you want to know the project I'm dying to try? Recreating the artwork above this chick's head:
framedq111510.jpg
There is something about it that's so interesting, but it's brilliantly simple.  I think the fact that it's placed in such an elegant space helps it from looking too "child's room".  (Although it would also be cool in a child's room, now that I think about it.)  Anyways, this would be so easy with a batch of paint chips and one of those craft circle punches.  

So yeah, I have a weird affinity for paint chips.  I want to try all these projects eventually.  I like them because they are simple and easy, even for those not-so-crafty ones, but they still look fresh, modern, and not-so-cheesy.  However, accomplishing one of these projects would require me to get my 4 week old baby to Home Depot one of these days.  Wish me luck!  

Monday, April 4, 2011

Take better pictures! Part A

Before I get into Part A of the series, Take Better Pictures, let me preface by saying I am not an expert.  I am not a professional.  And I am still learning.  Every day.  So take my advice for what it’s worth.  Everything I’ve learned, I learned through my own research. 

This advice is for those who have Digital SLRS.  SLR is Single-Lens-Reflex but that’s not very important information.  Forget I even mentioned it.

So, the first step in taking a better picture is to get off automatic.  That little green box on your mode dial (on Canons) sure is easy but it severely limits your creativity.

But before we do that, we need to learn, “What is an Aperture?”

Aperture is the opening or hole through which light travels.  Plain and simple.  Aperture is represented by the F-Stop number on your camera.  Ex: 1.4, 1.8, 2.8, 3.5…etc.  And here’s the tricky part, the smaller your F-Stop number the larger your lens opening will be, thus letting in more light.  Photographers who say, “I like to shoot wide open” are saying they like to shoot as low an F-stop as their lens will allow, helping their images become sharper and the Depth-of-Field more apparent as well as creating some beautiful Bokeh. 

carlyb-1

This picture was taken with my macro lens at an F-stop of 3.2 (my lens allows as low as 2.8).  You can see the nice blurred background giving the photo a more interesting perspective.

IMG_4893

Here the aperture or F-stop is at 1.4 with a 50 mm lens.

On your DSLR there is a mode for Aperture control, on Canons it is the mode, Av.  On Nikons I believe it is just A. Turn it to that mode and it will let you change the lens opening by turning the dials near the shutter button; everything else will be automatic. Play around with different numbers and experiment going as low as the lens allows.  Most kit lenses only go as low as 3.5 but it’s a good starting point.  Remember, the smaller the number, the larger the lens opening thus letting in MORE light.

Too much light = an over exposed image (very very bright/blown out).  Too little light = underexposed image (very very dark, black)

So if you go as high as F11 the lens opening will be very small and will let in very LITTLE light most likely resulting in a blurry photo.  However smaller apertures are useful when working in conjunction with slow shutter speeds ex: taking pictures of flowing water or speeding cars to  achieve that feeling of motion. (But more on that in another section)

So go forth and capture!  Experiment with F-Stops!

Thursday, March 31, 2011

Indoors with the Kids

Spring is upon us.  Yay!  I cannot wait to get outside with the kids everyday and be WARM again.  BUT, spring is a teaser in many parts of the country.    We have beautiful days and then we get some of the biggest snow storms of the year.  And, while I know the moisture is good for the land, and yadda yadda yadda, it's bad for me because that means more days cooped up inside with three busy kids.  In November, that's tolerable.  In April--not so much.  

So, what to do on those bad weather days?  When I'm being a good mom with loads of energy (wait, when do I EVER have loads of energy?), there are a few fun activities we do inside.  Thought I'd share them!

(Just as a warning--some of these are messy.  Very messy.  So, there's kind of a love/hate relationship there.  But the kids really think they're fun.)

 Oobleck
Don't know where the name came from. Basically, you mix some cornstarch and water together, maybe some food coloring, and MAGIC happens.  Seriously, the stuff is weird and fun.  I myself find it entertaining.  It's like a liquid that's a solid that's a liquid.  Lots of fun. Lots of mess, as you can tell from my little boy.  Oh, and it's not supposed to be edible.  Don't ask me why he's got stuff on his face.  

This one isn't quite as messy but it's still a lot of fun.   I made it with my son's co-op preschool class for Halloween and it was a hit.  Amazing what some household products can turn into!

 Edible Playdough
Another one that I love.  First, there's the peanut butter kind.  My favorite recipe so far is here.  Entertaining and yummy.  

Then, there's cake mix playdough.  Dangerous.  Very dangerous.  This stuff tastes way too good.  One of my boys pretty much just stuffed his face with it.  And then I stuffed my face with the leftovers over the next few days.  But it's fun because they can make "food" with it and then actually eat it.  Sometimes, I let them use chocolate chips for decorating. 

 Paper Helicopters

I got this cool book from my son's book order a while ago:


Some of the activities are more crafty than science-y, but what I really like about them is most of them use things I already have around the house and they don't take much time to do.  One of the boys' favorites was the spinning paper helicopter.
Boy, that kid really needed a haircut. 
I was going to write all the instructions for you...but then I got lazy and found a video that will work. This video has you use a template.  Our book didn't say to do that, but a template is an easier way to explain it.  It's really, really easy to make.  And my boys had a great time with them.


I like ideas that will get my kids' energy out.  'Cause otherwise, they go into hyper-crazy-silly mood which drives me totally crazy.  So indoor hopscotch is a good one.  You get some masking tape and make hopscotch squares on your carpet. You can add numbers or not.  And then play.  Easy and fun.

Another thing you can do with masking tape:  make "roads" for them to push their cars on.  My boys definitely liked that one. 

And of course, there's always balloons and dance parties and cookie-baking and crafts galore.  So if your kid is like mine and asks you several times a day, "What can I do??", you've got options!


Monday, March 21, 2011

Nutty

almondb2-1

I have a new obsession: making almond butter.

I really dislike the taste of store bought almond butter. But I’ve made several batches in the past few days, added different ingredients and it’s DEElicious. Better than peanut butter.  (Never thought I’d say that)

Today’s batch?  Dark chocolate cinnamon.  Oh.my.gosh.  It’s straight-out-of-the-bottle-with-a-spoon delicious. 

You’ll need:

-2-3 cups Raw almonds

-Food processor.  I attempted almond butter in my (Amazing, Awesome, Spectacular) Blendtec and while it can handle peanuts just fine, almonds are a lot more difficult to process so it overheated.  Boo.  So I said, “Hey mom, wanna buy a food processor?”  And enticed her with the idea of fresh almond butter every week.  (yes, it lives at her house but I visit almost daily.)

-1 1/2 c. melted 60% cacao chocolate chips.

-1 tsp. salt

-1 tsp vanilla extract

-1-2 tsp grapeseed oil (or coconut if you don’t mind that hint of coconut flavor)

-2-3 tsp cinnamon.  I LOVE the taste of cinnamon so I probably put about 4 tsp. in my batch today (and still not as strong as I wanted)

-2-3 Tbs. turbinado sugar.

-Patience.  Yep, just when you think your almond butter is finished.  It’s not.  Keep going.

First step, spread your almonds onto a baking sheet and toast in the oven for 10 minutes at 325* F. Let cool for 10 more minutes.


almonds-1 

Throw your cooled almonds into the processor and press start.


start-1

After about one minute it should look like this.


begin-1

After two minutes.


midway-1

Three and a half minutes.  Not done yet.


almost-1

Six minutes.  Don’t stop!


mixed2-1

Ten minutes.  Ahhh….beautiful creaminess.


chocchips-1

Now, melt those chocolate chips and grapseed oil in a glass bowl over a saucepan with almost boiling water. Remove when chocolate chips are almost fully melted.

chocolatefinger-1

And try to keep sneaky fingers away.

chocolate-1

Dump chocolate into your almond butter along with all other ingredients.

finished2-1

Voila!

And while you’re so engrossed in watching this concoction come together you’ll turn around and see this:

munchkinchoc-1

Oh my.  She’s like the chocolate Joker.   Note to self: Never leave melted chocolate bowl in the vicinity of an almost three year-old. 


almondb-1

Enjoy!

Thursday, March 10, 2011

Pregnancy Essentials

So.  In case you other 5 readers who aren't related to me haven't caught on yet, I, one of your esteemed blog authors, am pregnant.  Very pregnant.  In fact, my due date was last Tuesday.  And so far, no action on the labor front.  Such is pregnancy, I guess.  But as I not-so-patiently wait for my pregnancy to come to an end (which it surely must, right??), I've thought back to a few things that have really helped my body cope with the never-ending changes of pregnancy.  Now, seeing as this is my first, maybe these are all obvious to some of you more experienced mothers out there, but hopefully some of the things on my list will help make pregnancy a little more comfortable for someone.  Especially when you are 49 weeks pregnant... like me.


1. L'Occitane Verbena Foaming Bath Knowing my affinity for baths as well as all things lemon flavored/scented, my sweet husband got me this bath gel for Christmas.  And while I'm sure that he had a little help from the saleswoman at the beauty store, it was the perfect gift because oh.my.gosh. this stuff smells like heaven.  Seriously.  As it turned out, I have had to deal with really bad RLS this last trimester, and pretty much the only thing that calms my muscles and helps me sleep is a warm bath before bed, and this bath gel just makes those baths that much more enjoyable.  

2. Nike Free Run+ Now, I know people are pretty particular about their running shoes, especially if you run a lot, and I can't attest to these being amazing running shoes yet, because well, I haven't had a chance to actually run in them yet.  But I can tell you, these are the most comfortable shoes I've ever worn.  They have some crazy technology where they bend with your foot a lot while still providing a lot of support, and with all the cushioning they feel sort of like slippers.  I've taken to wearing them everywhere, especially during the last couple weeks when I can't stand wearing my other shoes for more than 10 minutes.  And I've definitely given them some major mileage the past few days with all the walking I've been doing in trying to get this baby out.  

3. Burt's Bees Beeswax Lip Balm Ahhh... who doesn't love Burt's?  I've been a dedicated fan for many years, and it's safe to say I'm a tad bit snobbish towards other chap-sticks.  I'm also a tad bit obsessed with Burt's (just the classic minty lib balm variety, not the tinted balm or lipgloss or anything else) - I always keep one in my car, on my nightstand, and in my purse at all times.  And people didn't tell me how much I would need chap-stick during pregnancy - my lips are constantly chapped.  And since I live quite literally at sea-level, I'm not chalking it up to "dry winter air".  Anyways, I heart Burt's Bees.  Pregnant or not. 

4. Exercise Ball This isn't actually the one I have, I just chose this one for it's pretty pink color.  But many are the benefits of a large exercise ball like this one for pregnant women.  Definitely more comfortable than sitting on a chair or even the couch, my exercise ball has provided me a lot of relief during my entire pregnancy, and is also great for laboring mothers (or so I hear).  Just google "exercise ball and pregnancy" and you'll find lots about how great they are.  The size of the one you get depends on your height, but I think for average-height women you want one that is 65cm.  

5.  Microwavable Heating Pad  A heating pad has been so great for the little aches and pains of muscles during pregnancy, and again, is supposed to be great during labor, too.  You can find them lots of places, but seriously, they are so easy to make and way cheaper to do it that way.  I made mine and they are pretty hard to screw up, but if you have a sewing phobia (*ahem* Lindsay and Carly), they also sell cute ones in lots of places on the interent.  This one is from Etsy.  Another fun fact - you can put them in the freezer and use them as a cold-pack, too.  


So there you have it!  Some pregnancy essentials I'm sure glad I had during this pregnancy.  Now, let's hear what you couldn't live without during your pregnancy - I'm curious to know.  Also, I need to have something fun to read to distract me from dwelling on the absence of my labor.  So let's hear it, people - what did you love during pregnancy?  


Thursday, March 3, 2011

Roasted Beet Salad

Surprise!  Bonus post this week!  Yeah that’s right. Just thank the hubby who is at a meeting, the girls who are sleeping and the DEElicious dinner I made tonight that I shall now share with the world {read: you 10 or so readers.}

beetsalad1 (1 of 1)

Look at those colors! And it’s a sooc shot!

So, the other day I received beautiful purple beets in my organic produce co-op crate.  It thought, well what in the heck am I going to do with these?  I’ve literally never, ever cooked beets in my entire life.

So that’s where Google came into the picture. (Pretty sure my family would have starved before the internet.) 

I found this recipe for a beet salad and adapted it slightly.

Ingredients:

Chicken breast

Mixed baby greens

Purple and gold beets

Lemon

lemon pepper

olive oil

feta cheese

salt and pepper

First, cut the stems off the beets, wash and place on aluminum foil.  Drizzle olive oil over the beets and sprinkle with salt.  Completely wrap the beets and place on your grill or in your oven (at about 350*). Check beets after about 20 minutes and remove when tender.

While the beets are roasting, sprinkle the chicken breast with lemon pepper and place on the grill.

When beets are done let them cool for a bit and when they are not too hot to handle, remove the skins.  Chop into quarters.

Place greens, chopped beets, and sliced grilled chicken into a bowl.  Squeeze lemon juice from a fresh lemon over the salad, drizzle some olive oil, sprinkle some salt and crumble the feta cheese on top.

It is SO.SO good.  The tanginess of the feta cheese along with the sweet, roasted flavor of the beets is YUM.  (almost said YUM-O, shoot me I am NOT Rachael Ray.)

Another bonus?  It’s healthy.  Can’t beat that!  Apparently beets are insanely good for you.

Monday, February 28, 2011

Your guide to sushi lovin’

Disclaimer: none of these pictures are my own.  Thank you google images.

Fact: I love sushi.  Fact: I used to hate it.

I think I can speak for all of my sisters when I say, sushi is GOOD (except for maybe Lindsay, I think she’s still in the process of training her palate.)

Sushi is somewhat of a polarizing subject amongst those who love it and those who absolutely despise it.  “No WAY am I trying that stuff.  Raw fish is disgusting.”   Just try it, you’ll love it!  C’mon!  Don’t be a wuss!”  And so on and so forth.

So, let’s clear the air. 

First, WHY should you love sushi?

Because it’s healthy.  And delicious (okay we’ll get to that part later.) But really, it’s so GOOD for you.  And I’m not talking about the deep fried pieces of shrimp, I’m talking about RAW fish like salmon, yellowtail and tuna.  Packed with trace minerals, omega fatty acids, protein and enzymes, sushi is low in calories and saturated fat.  Right there should be all the reason you need to try it out!  The seaweed which accompanies most rolls, called Nori, is also chock full of vitamins and minerals with little caloric intake. Bonus: For people like me who have certain thyroid disorders, (hypothyroidism, Hashimotos) Nori is the perfect antidote because it contains quite a bit of iodine, which is crucial for optimal thyroid health.

Second, sushi is an acquired taste.

The first time I tried sushi I was in high school and almost gagged on the roll.  I thought, people actually EAT this crap?  No way.  Then, while dating my dear, sweet husband he introduced me to the chicken teriyaki roll or what I call, first base sushi. No fish in sight.  I thought, well this is tolerable.  Even good. Then I moved on to shrimp tempura.  I mean really, anything that’s fried is going to taste delicious.  Then I moved on to second base:

california

It’s called a California roll and it’s the gateway drug to sushi addiction.  Usually consisting of Krab, (yes with a K cuz it’s not REALLY crab, it’s actually Alaska Pollock) avocado and some type of crunchy vegetable like carrots or cucumber, it’s the tamest of sushi rolls.  Start with that.  If you don’t like it, that’s fine because once I reached Sushi Snob Status I stopped liking it too.  Go figure.  Also, that pink stuff on the side of the plate is ginger.  It’s for palate cleansing.  Technically you are supposed to eat it in between bites but I enjoy putting it directly onto whatever I’m eating.  The green stuff is wasabi (Japanese horseradish) and be forewarned: If you put too much of that stuff on your food, you will feel as if you just ingested the fire of a thousand suns.

Once you have mastered (or decided to skip) the California roll, I’d suggest moving up to third base.  Easy there, I’m talking about rolls which contain actual raw fish.  Like a spicy tuna roll:

Spicy tuna - cut roll

However if spicy isn’t your thing then by all means, ask for a regular ol’ tuna roll.  Now before you freak out and say,  But it’s going to taste so FISHY!   It’s not.  Trust me. Nobody in their right mind would willingly pay for and eat food that tastes like rotting fish flesh.  So nix that excuse from your repertoire.

If you love avocado you’re in luck.  Many sushi rolls have oodles and oodles of fresh, creamy avocado mixed throughout.  One of my favorites is the 911 roll:

911 rolls are regularly made with spicy tuna, cucumber and avocado.  Half of the roll is doused with a sweet eel sauce (EWWW EEL….oh calm down) and the other half with spicy sauce.  Mmmm…my mouth waters just thinking about it.

Once you’re ready and willing, it’s time to go HOME. Straight up raw fish over rice.  Nigiri.  Or maybe even Sashimi (thinly sliced raw fish.  That’s it.)

Nigiri is my favorite.  The sweetness and stickiness of the rice along with the soft, buttery texture of the fish is to.die.for. Wait, wait…hold the phone…what?  Raw fish isn’t RUBBERY?  It isn’t CHEWY?  Nope.  Well, at least it’s not if you go to a good, reputable sushi restaurant where you know the fish is actually fresh. Super fresh fish like the salmon, yellowtail and tuna I talked about earlier will almost feel like it melts in your mouth. 

NIGIRI_-_SUSHI.jpg (41755 bytes)

left is shrimp, top middle is salmon, right is tuna, bottom is yellowtail

So now that I’ve talked to you about he basics of sushi eating and abolished all of your excuses (except for the I’M DEATHLY ALLERGIC excuse) get to it.  Ask sushi lovers which restaurant is their favorite and work your way toward becoming a sushi elitist.  It’s a fun club,  one where we make fun of people who refuse to try any kind of fish and where we throw down sake like there’s no tomorrow.  Kidding.  Maybe.  Well, just about the sake part.

So please, join us up here. 

Wednesday, February 23, 2011

My Three Favorite Workout DVDs

Since most of my posts are about food, I figured I needed to balance myself out a little with some exercise--in the form of my favorite workout DVDs!

I really love exercising (no, really, I do!) and more than anything, I love to RUN.  But, when roads are icy, the temp doesn't get above zero OR I'm just too lazy to get out of bed before the hubby leaves for work, I gotta have other options besides running.  And, since I don't have a gym membership or a treadmill, I have DVDs!  

I have specific criteria for a good workout DVD:
1.  It has to be CHALLENGING.  In my opinion, there are a lot of wussy workouts out there.  My favorites push me and make me sore!
2.  It has to be SIMPLE enough for me to get it down after the first try.  No complicated dance steps for this girl.  Also, it can't require a bunch of fancy, schmancy equipment--a couple of dumbells, maybe. 
3.   It has to have some VARIETY.  The same workout can get pretty boring.  So, alternative workouts are a must.

And, here are my faves!
Now, I know this one is expensive.  And I guess I really don't know firsthand how pricey it is since I'm borrowing the DVD set from a friend.  But, believe me, I would spend money on these DVDs.  I LOVE them!  I could kiss Tony Horton if I met him.  Okay, not really, but seriously, these DVDs are challenging, but easy to pick up and there are so many different workouts to choose from--plyometrics, yoga, weight lifting, kick boxing.  I've been doing them all winter.  And you don't have to go hard core and do the whole program, unless you really want to get totally ripped.  I just do whatever DVD I'm in the mood for at the moment, although I do try to mix up the harder workouts with the easier ones.  Seriously, I love P90x!  Best workout DVD program I've ever done.
 
Biggest Loser fans know Jillian and how she likes to scream in people's faces.  Well, she doesn't scream in your face in this DVD, but her workouts are definitely hard.  I like this DVD because she has three different workouts, which are all good workouts, and each is only 20 minutes long.  So, if you have a busy day but you still want to get in some form of exercise, you can just do one of these workouts.  But if you have more time, you can add another--and that's a challenge!
 
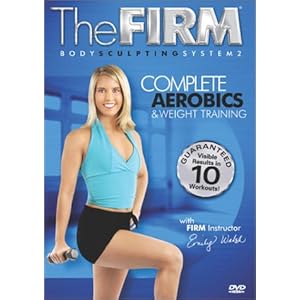
The Firm goes way back.  And it was one of the first DVDs I ever worked out to.  Despite it being a little old school, the Firm is a good workout.  I particularly love the one above--it's a good overall workout with cardio and weight lifting but it's not too complicated.  There are a ton of Firm DVDs to choose from.  I'd say they are more aerobic-based, which isn't always my thing, but the ones I've done are simple enough for me to get.  And they're not too cheesy.  And the first time I did this DVD, I was sore for over a week--seriously.  Being 7 months pregnant at the time may have had something to do with it, but regardless, it was a good workout.

Oh and one more thing:  a good, cheap (free!) way to try out new workout DVDs is to check your local library.  They should have a selection of DVDs and you can try a bunch of different ones.  I know mine carries a bunch of The Firm ones.
So there you go!!  Go get sweaty!

Wednesday, February 16, 2011

Mad, Sad, and Glad Music

I've mentioned my love for music before, but I can't express it enough. I am constantly on the hunt for new tunes. If I am intrigued by a song in a T.V. show, movie trailer, etc., you can bet the second I get the chance to, I will be looking it up and most likely downloading it. When I listen to a song I like, I get lost in the rhythm and allow my my heart to fall completely in love with the lyrics. Music is food for my soul; I can practically taste the wonderful melodies and they are oh so delicious. Obsessed? Absolutely. Music is my anti-drug and I am completely and 100% addicted.

So, I am putting my infatuation to use. I'd like to suggest songs to listen to when you're happy, sad, or mad. These are by no means "classic" songs, but merely tunes on my current play list that I recently find myself going to depending on the mood.


Happy/Carefree


Sad


I won't lie, I actually tear up while listening to this. There is something so beautifully mysterious about this song.


Angry/Defiant


Happy listening! :)

Wednesday, February 9, 2011

Refinishing Wood Furniture

Short story - some time ago, I needed a dresser to house little boy clothes that will soon be worn by a newborn little boy of mine in about 4 weeks.  I dreamed of a Mid Century Modern one but they were far out of my budget.  But, I persevered and found one on Craigslist - for. FREE. It was a magical day, truly it was.  But, this dresser needed a lot of TLC which I was happy to provide.  So, in the case that you might have some wood that needs some refinishing, I thought I'd share my process with you.  Unfortunately I did not have the foresight to take a real "before" picture, but you'll have to use your imagination when I say it was in pretty bad shape.  


Materials you'll need:
Howard's Restor-a-Finish, Howard's Feed-n-Wax, fine grade (0000) steel wool, rubber gloves, and a mask (especially if you're pregnant like me.  And even if you're not.  Fumes are bad in general.) Also not pictured - wood filler burn-in sticks and wood putty in the shade of your wood, and a soft cloth. 

Step 1: Prep Work
Clean your furniture, inside and out, especially if you got it off Craigslist or at a thrift store or something.  Vacuum inside, and wipe everything down with a mild cleaner.  

Prep the wood by filling in any scratches and chips in the wood with your wood filler sticks and wood putty.  When you've filled in all the knicks, make sure the surface is completely smooth and dry before moving on.  

Step 2:
Break out the Howard's Restor-a-Finish.  I had never used this product before and I was a little skeptical since it is a little pricey, but I decided to give it a shot since I bought it at Home Depot and you can return anything you want there.  (Also a side-note - this stuff comes in different colors, and they didn't have one that was close to my shade of wood, so I just went for their "Neutral" shade, and it worked like a charm).  Let me tell you people - this stuff is magic in a bottle.  

Anyway, wearing your mask and rubber gloves, take a section of steel wool and poor a bit of the Restor-a-Finish onto it.  Rub gently in the direction of the wood grain and watch magic happen.  This stuff seriously took out all the minor scratches, water, and heat rings without breaking a sweat.  I was elated, since all the other methods of refinishing wood I looked into required sanding the finish off first and I really hate sanding.  This stuff was super easy and the wood looked brand-new when I was done.  

Step 3:
Wait for the Restor-a-Finish to dry (I only waited a few hours), and then apply the Howard's Feed-n-Wax by squirting a small amount on a soft cloth and rubbing down the entire piece. (I should probably say that I am not getting compensated by Howard's to say any of this. Although that would be cool.)  It's funny though, this stuff has been around forever and totally reminds me of my Mom.  She used to make me use it to dust all the wood furniture in our house, and the second I opened and smelled it this time, I felt like I was about 9 again, getting my Friday chores done.  Anyway, this wax will help preserve the wood finish and keep it looking all shiny and pretty.  

After I had finished the steps above, tah-dah!  This is what the dresser looked like:
That was probably a little anti-climatic since there was no before picture.  But trust me, it looks lightyears better than it did.  And please ignore the random cord coming out from behind the dresser.  I was too lazy to move the dresser to unplug the lamp just for the picture.

So at this point you could be done.  But while I loved the look of the dresser in the first place, I wanted some hardware to make it look extra pretty.  So I ordered these pretty ring pulls to put on the middle drawers.  After very carefully measuring and marking where I wanted them to hang on the backs of the drawer fronts, I forced my sweet husband to drill the holes in the drawers for me.  

After screwing on the ring pulls... 
this beauty was finished!  

A little close-up of the hardware.  


And there you have it - refinishing an old (free!) dresser from Craigslist in just a few steps.  

And just for fun, look what I found on the inside of one of the drawers?


The Escort - charming name, isn't it? :)  After a little googling, I found that this is a legitimate dresser made in the 50's or 60's, and similar refinished pieces from Kent Coffey can go for a lot of cash.  I shouldn't have mentioned this to my husband - he was a little tempted to sell this bad boy and make a profit.  I said no way - it's all mine!